Anyone spending a lot of time exploring the outdoors owns and knows how to use a survival knife. Since the survival knife is designed to help you in emergencies, it has many possible uses and can aid in the most surprising ways, but not everyone knows how to use it to its full potential. Unlike other knives, the survival knife can do a lot more than cutting—you just need to learn how to get the best out of it.
Page Contents
1. Dig into soft ground
When the soil isn’t too rocky or too hard, you can use the survival knife to do some digging before you ruin its edge.
Soil, rocks, and sand will file down the edge pretty quickly, making it dull. If you’re using a large knife as your no.1 survival tool, you can use it as a trowel. The survival knife can become your tool to work in the soil, from digging out edible tubers and roots, to excavating little latrines. It’s an absolute brutal thing to do to a knife, so make sure you have the supplies and skills to sharpen the knife afterward.
2. Scrape with the spine
When the knife features a square spine with a crisp edge, you can use the side for various scraping situations. We know that square knife spines with accurate edges aren’t very popular because they chew up batons. Many users prefer a saw back or a false edge on the knife spines. However, if you also own a crisp square spine, you might want to use it for some scraping.
The primary use is scraping ferrocerium rods. Instead of dulling the knife edge when scrapping the metal alloy rod (it makes fire), you could scrape with a square spine and cause the incendiary sparks. If the spine is impressive, it can work as a wood scraper for various tasks: tool production and bow making. Should you lose the square shape, you can use a file to touch up the spine’s top. Use a smooth metal object (the side of a screwdriver) to strike it down the spine edges. Put some pressure into it because you want to burnish the spine and obtain some burs on edge. When you’re done, the spine should scrape better than before.
3. Use the hardwood baton as a hatchet
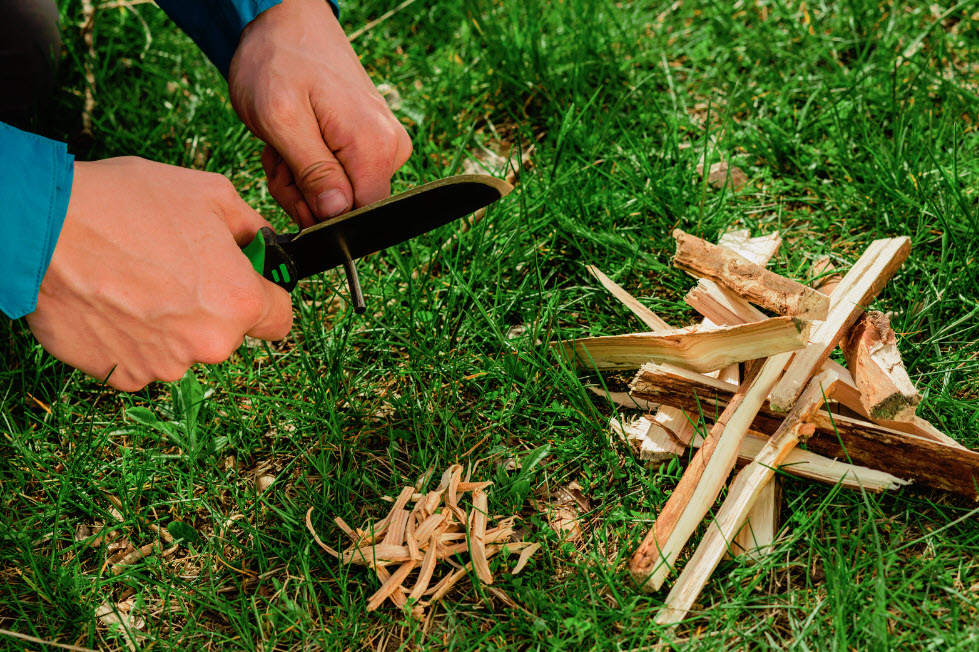
If you picked the right survival knife, you should be able to use it as a hatchet. Robust blades should take a beating and even split wood, so the next tip isn’t for a folding knife or a fixed-blade knife. If you use a hardwood stick and hamming on the knife’s spine, you can use it through firewood and even try some wood carving. The batoning method is excellent to “rough-in” survival stick-bows and thin wooden sticks. Don’t throw away the wood chips from the woodworking because you can use them for kindling if need be.
4. Drill a hole
As long as you know a thing or two about twisting, you can use the knife’s tip to drill some holes in all sorts of objects and surfaces.
One might wonder why you would need to drill holes in random things? If you’re a creative outdoor enthusiast, you know that all sorts of tasks (drilling included) can help you in emergencies. If you cannot find drinkable water, you can drink some water and sweet syrup after drilling a hole in a maple trunk. You can only do it in February and March, so keep that in mind.
You can also use your survival knife to drill some tiny holes in bone chunks for fishhooks and needles. If the material is soft enough, twisting the blade back-and-forth will be enough to make the holes.
5. Make a spear out of it
If your survival knife is top-quality, it should be great at carving a point on a stick, turning it into an elemental spear.
Being able to bind the survival knife to a wooden pole to make a sort of spear doesn’t happen only in the movies; many knives are made for that purpose. Some knives with skeleton handles and removable handle scales should sit tight against staff or a pole. After lashing it safely in place, the knife turns into one of the oldest tools: the spear. You will be able to use it for hunting and defending. It’s not the most sophisticated weapon, but it’s a weapon that you can use.
6. Use the knife as a projectile
When properly used, a good survival knife can work as a projectile weapon. Throwing a knife happens a lot in action movies, but it can be very helpful in emergencies. If you’re not very good at it, you could lose your knife in the woods; if you’re skilled, you could skewer a small animal or protect yourself from a distance.
The overhand technique is the most popular method to throw the knife. You should hold the knife by its blade, keeping the knife’s spine against the hand. Hold the knife by your ear, aiming at your target. Swing your arm and let go of the knife. Distance and timing are crucial, so some practice with the technique is necessary for good results. Spend some time playing and try throwing at different distances (5 yards, 8 yards, 10 yards, etc.). Flick your knife harder or softer until you can stick it on a regular basis.
7. Hammer with its handle
The handle of a good survival knife can work as a blunt object to strike things. You can use the beefy handle to drive stakes in the ground or even break the car window in an emergency. It depends a lot on the model and the make, and some have a pommel coming to a point for real impact. A flattened pommel with a textured grip is great to hammer stakes, crack nuts, or open shellfish.
Always stay safe when using the knife as a hammer. If it’s a fixed blade model, remember to leave it in the sheath while hammering (you want to reduce the risk of stabs and cuts.)
8. Flash it to make a distress signal
If you find yourself in the worst-case scenario, you could use the shiny blade of your survival knife as a simple signal mirror.
A blade with a polished and reflective finish will signal your location to rescue teams or location buddies in the middle of nowhere. You can use your shiny knife as a primary signal mirror that can reflect sunlight, letting other people know that you’re in an emergency. Since the blade is polished but doesn’t have a sighting element, it’s not going to be easy to aim the light. You can hold the knife so that the light bounces off the knife’s blade. Don’t hesitate to try different things until you aim at the beam of light; you might have to move the entire body. Sweep it side to side, up and down, working very slowly across your fingertip. Place your finger right under the distant target. If you’re patient and lucky enough, someone will eventually notice your signal.
One last piece of advice
The survival knife has many purposes, and you should spend time learning all about its uses. If you’ve searched high and low for a good survival knife, it would be a shame not to put it to good use. Even if you didn’t empty your wallet for this knife, you should still master using it in the most surprising ways, whether it’s a matter of life and death or simply digging a hole in some soft ground.
How should you choose a survival knife?
If this is the first time you’re buying a survival knife, the myriads of options will overwhelm you. To pick the best survival knife that suits your needs and preferences the best, you will need to examine several aspects. We’ve put the most significant of these aspects into a buying guide to help you decide when buying. Here’s what you should check out when shopping for a survival knife.

Size
The perfect survival knife is 9 to 11 inches long, from the blade’s tip to the bottom of the handle/pommel. Therefore, the blade should be at least 7 inches long. Professionals see this length as ideal; if the blade is longer than that, it will be tricky to use for accurate tasks, such as carving snare sets or gutting small game. The blade shouldn’t be too short either because it won’t be helpful with complex tasks such as chopping or self-defense.
Blade
There are many aspects to examine on the blade of the survival knife. Each of them is important, to spend some time inspecting them.
fixed or folding
Make sure that the blade of the survival knife is permanently fixed. A folding knife sounds more appealing and is more versatile than a fixed model, but the joint in the folding knife will make the blade less efficient in some tasks. Also, the blade will be less durable in a folding knife. Since you will use the survival knife for heavy-duty tasks, it should withstand wear and tear for many years.
A fixed-blade construction makes the knife dependable in tasks such as splitting, prying, chopping, cutting, and even curving.
Blade material
Modern knives are made with various materials, but carbon steel stands out among the rest. Carbon is the toughest element and blades made of carbon steel present unique hardness, sharpness, and excellent edge retention compared to stainless steel blades. The drawback with carbon is that is it may rust and requires cleaning after each use.
The blade shouldn’t be too hard because it will be brittle. Take a look at survival knives with stainless steel blades because they don’t rust. However, these knives will lose the edges quicker than carbon steel. If you expect to use the knife in wet environments all the time, get a stainless steel model. If your tasks will be challenging and demanding, pick carbon steel instead.
Blade thickness
A robust and thick enough blade will withstand use for many years and won’t bend from cutting, prying, etc. Seek that the blade thickness ranges from 5/32 (0.156) to 1/4 (0.25) of an inch.
Blade tip
When you check out the blade tip, there are two aspects to examine: sharp and pointed. We recommend you stay away from the odd-shaped blades because they will not allow you a wide range of tasks. Go with a strong and sharp point instead because you can use it also for hunting.
Blade grind
The blade’s grind refers to the angle and shape at which a knife’s cutting edge is made by grinding on a grindstone or a belt. The flat grind (the v grind) is the most common; it’s simple and easy to sharpen.
It’s only a matter of time until you have to sharpen your knife and you won’t be able to use the grindstone out in the wild. If this is your first survival knife and you don’t know much about sharpening a blade, we recommend buying a knife with a flat grind.
Tang
The part connecting the blade with the handle is known as the tang. It’s the “butt” or the “tail” of the knife and it’s typically encased within the handle, or the handle covers it. For a survival knife, the tang should be full. Therefore, the blade extends from the point to the back of the handle in just one full-width piece.
Sometimes, the handle is molded onto the tang and a full tang ensures excellent strength and durability.
You can also go with a skeletonized tang if you want your survival knife to be lighter than usual.
Handle
The survival knife handle is just as important as the blade, and you should never skip paying attention to it. Always get a knife with a sturdy handle and stay away from knives with hollow handles—they don’t have a full tang. Get a survival knife that doesn’t come with extra features, such as a compass on the handle—it will simply decrease its performance.
Even if it might be helpful to have a survival knife with a hollow handle filled with valuable items (safety pins, fishing line, matches, etc.), this will significantly alter its durability because it doesn’t have a full tang.
Here are some things to look for when checking out the handle on your survival knife:
- It should have a durability feel
- It should stay attached to the tang and not wobble or have any “play”
- It should ensure a steady, yet comfortable grip
The materials used for the handle are many. Still, some stand out with the durability: plastic, Kraton (synthetic rubber), leather, wood, nylon polymer, nylon resin, micarta, epoxy resin, g10, and even a full tans with/without paracord wrap. As long as the handle is rigid and offers a sturdy and comfortable grip when wet, iced over, dirty, etc., you should always consider it for buying.
Seek that the handle is contoured to take the shape of your grip. For example, a simple tubular shape will get uncomfortable after holding it for many hours. Some materials (Kraton is one) are long-lasting and have efficient shock absorption. You don’t want your hand to slip forward onto the blade’s edge.
If you plan to use the knife in areas where you might drop the knife, look for a knife with a lanyard for secure carrying.
Sheath
No survival knife will be reliable unless you have it on you. Most fixed blades come with a sheath, so it’s essential to examine it too. The sheath has to hold the knife safely and not rattle while you’re on the move. A good sheath has an adjustable/fixed loop so that you can mount it to a belt. There are many ways to attach the sheath to your vest, backpack, or molle webbing.
Leather, synthetic materials, polymer (Kydex), and hybrid materials are standard for the sheath for knives. Each has its ups and downs, so give it a thought when selecting. Also, don’t forget to check out the retention methods. Many polymer sheaths are form-fit for the knife and the knife only “clicks” into the sheath. Even though you know when the knife is stowed in the sheath, this type of mechanism will wear out in time, so you should pick wisely.


